Monday, November 1, 2021

Mouse Droids First Halloween

Mouse Droid not only celebrated Halloween, but also her 6 month date of being relatively complete. 

I learned the basics of servos with Arduino to give her a spooky spider costume. 


I tried to make multiple servos work, but have an issue with either not enough or too much power. Looks like another fun challenge for the future. Another disappointment was discovering I had neglected the battery for too long, and it is dead. A new one is on the way, but obviously not in time for Halloween night. 

Either way, Mouse Droid was able to dress up and get some candy.


Monday, May 3, 2021

Test Drive: Success

Today was test drive day, which was a great success!

Test Drive footage:


Doing some donuts:


Alternative YouTube: https://www.youtube.com/channel/UCkBETSpwpr6rPG7M3-JmVcw

And my Mouse Droid is done (relatively speaking)! Some future features I'd like to add would be sound, lights, maybe some decorations like a spinning satellite dish, and more. 


Attaching the Side Greeblies

This finishing touches, putting the side greeblies on the top shell.

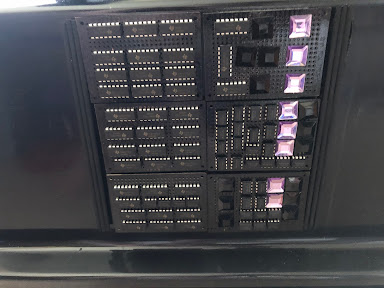
I already had velcro measured, cut, and stuck on, so the only thing left was to carefully place them on the top shell. I found out the placing the PCBS exactly in the center meant only using a 3x2 of PCBs, not 3x3. This is fine, as I now have leftovers for another droid.

I also stuck the dowel pairs (3 dowels per set) on the outer sides of each PCB.


And the final result looks great!


The only thing left to do is test drive this....


Thursday, April 29, 2021

It's Starting to Look a Lot Like a Mouse Droid

I took some spare time today to put velcro on the other ends of the blocks, stick them to the top greeblies, and stick those on top of the mouse droid/top shell.


I also did some touching up on the paint for parts of the side greeblies, and stuck the sticks to velcro. They will go on the sides soon.


I also decided to paint the edges of the MDF just for looks.


Wednesday, April 28, 2021

Longer Bolts, Some Painting

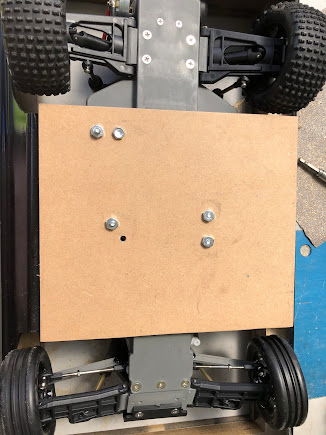
I went to Home Depot today and got longer bolts for the RC car body, MDF, and shell "sandwich". 

The drill bit I used was a 13/64, and my original bolts were #10 x 1 inch. These new ones are #10-24's that are 1 and 1/2 inches long.


They're in! Much less of a chance of things falling off. I also put 3 washers on to distribute some of the weight a bit more. 

I also got my paint today from the craft store, so I got to work hand painting the sticks and blocks. 


Tuesday, April 27, 2021

Suspension Solved, Strengthening the Lower Shell, and More (special thanks to Mike Senna)

This morning, I went to Mike Senna's place to get help with my suspension problem. The plan was to take off the small end pieces, put brass tubing on each rod, move the shock parts closer to the RC car body, and put everything back together.

Mike figured out you can use other holes on the back wheels, not just the large threaded one, to move the suspension parts closer to the RC car body. He let me do the rest, which was tough. You have to keep strong pressure on the screw so you don't strip it, and keep it as straight as you can. It's not meant to be the primary spot for the screws, but can be used. 


Next, Mike used his mini cut off saw to cut the brass tube into smaller pieces. He measured the rods and cut the brass tube to size. 


Next was slipping the brass tubes over the rods, putting the end parts back on, and screwing the suspension parts back in.


I wasn't planning to do anything with the bottom shell yet, but Mike mentioned the bottom shell would be vulnerable to cracking. The shells are thin and the RC car is heavy, so the bottom shell needs more support. He had some MDF that he cut down a little and had me drill into. I had to do a few adjustments, but I got the MDF lined up with the shell and car. I'm likely going to buy longer bolts because these #10 x 1'' are a bit too short. 


During some test driving, a tiny part that I believe is called a wheel pin was temporarily lost. This kept one of the back wheels from working properly, messing with the rear wheel drive, which was due to the missing pin and the need to tighten the wheels. 


Whoever owned this Traxxas before me switched the plugs that connect the motor and ESC, so Mike showed me how to switch them. Unsure why, but it turns out this is an easy fix. 


After all this, the bottom shell drove well with both frame parts in. I put the top shell on (a small increase in weight), and did more successful test drives. It. looks great even without details, but there's still more work to be done. A successful breakthrough and lots of progress thanks to Mike!


Monday, April 26, 2021

Traxxas Bandit ESC Set

I wanted to test my Traxxas to make sure it would run, since I haven't touched it since pre-covid, and ran into a small problem. Something must have gone wrong between the remote controller and Electronic Speed Controller (ESC), because it wasn't driving. It was turning, but not driving. I noticed the ESC LED was blinking red and green. 

I did some googling and found this from Traxxas: https://traxxas.com/support/What-Do-When-ESC-Flashing-Red-and-Green

I'm pretty sure I just reset the ESC and paired it with the remote again, or something similar. 

I tested the car again, and it "drove". The suspension has been taken apart, so I had to hold it up a little and test it (since I only have two arms, I couldn't film it). 

I thought I'd post this in case anyone else ran into this problem.

Mouse Droids First Halloween

Mouse Droid not only celebrated Halloween, but also her 6 month date of being relatively complete.  I learned the basics of servos with Ardu...